How to Package Virtual Staging and Virtual Tours for Real Estate Clients
A practical way for real estate photographers to package virtual staging and virtual tours with clear scope, pricing, review, and client handoff.
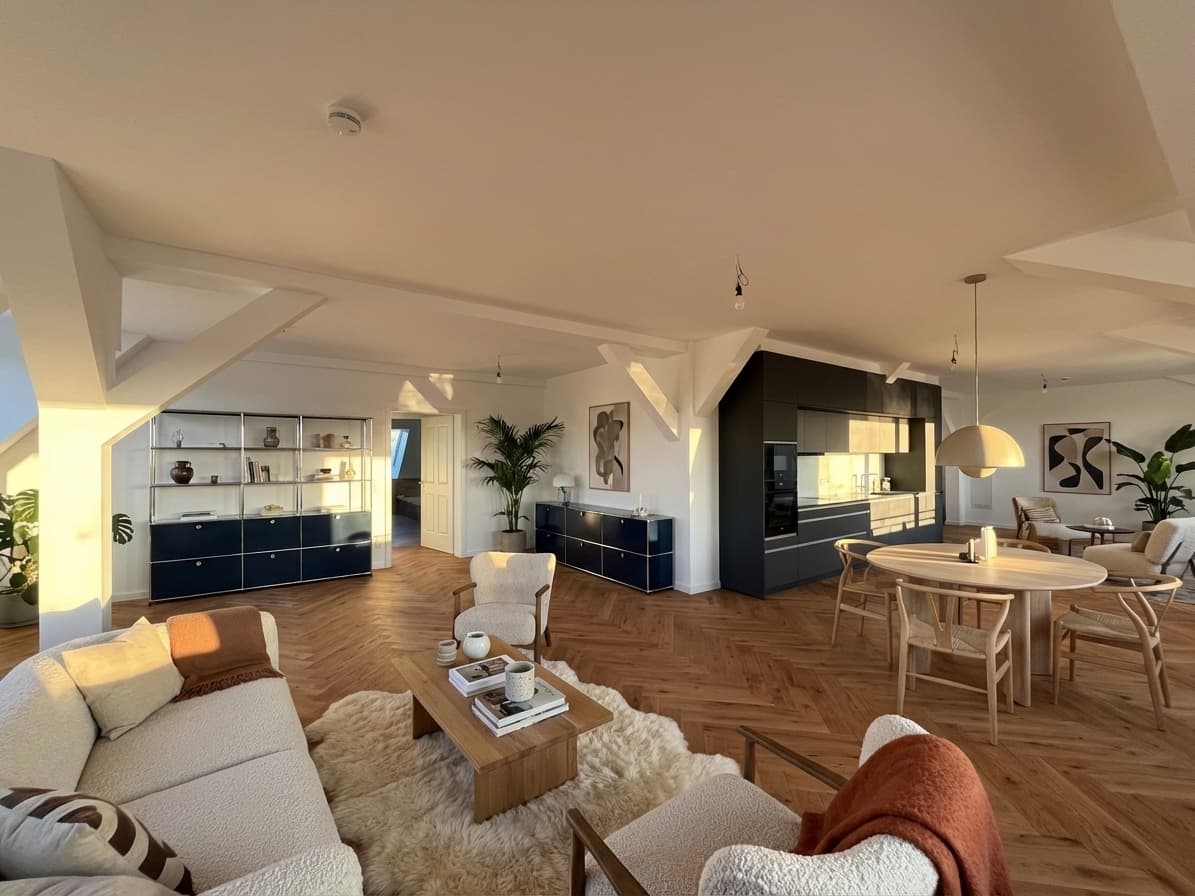
A virtual staging and tours package can give agents one coordinated way to market a vacant or lightly furnished property. The package combines two different services: virtually staged still photos that help buyers interpret key rooms, and a virtual tour that lets them move through the property remotely.
The commercial opportunity is to manage them as one client offer with a shared brief, defined production sequence, and single handoff. Staging enhances selected listing photos; the tour comes from the photographer's existing tour platform, capture system, or specialist partner.
Planua fits specifically on the staging side. It does not create virtual tours. Photographers can use Planua to prepare staged still images, then deliver those images alongside a separately produced tour inside a broader listing-media package.
Quick Answer
To build a virtual staging and tours package, define the exact number of staged stills, specify the tour format and provider, name the rooms covered, set one review round for each component, and deliver originals, staged images, tour links, and disclosure notes in clearly labeled folders. Price the package from its complete scope and production time—not by treating staging and the tour as interchangeable outputs.
For staging, explore Planua for real estate photographers. Keep your current tour workflow for capture, hosting, navigation, and link delivery.
Package Overview
A practical package can be explained in five lines:
| Component | What the client receives |
|---|---|
| Property photography | The agreed edited listing-photo set |
| Virtual staging | A defined number of staged stills for named rooms |
| Virtual tour | One hosted tour created through the photographer's chosen tour system |
| Review | One consolidated review round with a stated deadline |
| Handoff | Download folders, tour link, originals, usage notes, and staging disclosure reminder |
This gives the agent one purchase decision while keeping boundaries visible. A staged still does not change a separately captured tour. Unless the tour platform supports compatible editing, the tour should show the property as captured.
Define the Client and Listing Fit First
The package fits clients who want immersive property media and have empty rooms that are difficult to read in still photos, such as a vacant apartment or unfurnished new-build unit.
Before quoting, ask:
- Is the property vacant, occupied, or partly furnished?
- Which rooms need scale or purpose clarified?
- Which areas will appear in the tour?
- Does the client expect the tour itself to contain virtual furniture?
- Where will the stills and tour be published?
- Who approves edits and disclosure before delivery?
If the client expects furniture inside the tour, explain whether your tour system supports that request before accepting the job. Planua creates staged still images; it does not insert furniture into a navigable tour.
Set a Precise Scope
A package should name outputs, limits, and exclusions. “Photos, staging, and tour” is too vague to quote or fulfill reliably.
Define the photography scope in your usual terms, then add a staging schedule that identifies:
- the maximum number of still images to be staged,
- the rooms or image selections covered,
- the intended room use and visual direction,
- whether one alternate concept is included,
- the number of revision rounds,
- and the final file formats and dimensions.
Define the tour scope separately:
- the tour type or platform,
- the areas included or excluded,
- whether hosting is included and for how long,
- whether navigation labels or information points are included,
- the expected link-delivery format,
- and any access, rescheduling, or property-readiness conditions.
State what the bundle excludes, such as floor-plan drafting, renovation visualization, removal of permanent defects, unlimited furniture changes, dusk conversions, or virtual furniture inside the tour.
For a staging-only service structure, see the existing virtual staging workflow for real estate photographers. The combined package should build on that workflow without duplicating every photo-service decision.
Choose Staging Images That Complement the Tour
The tour supports spatial exploration; staged stills create composed views of selected rooms. Choose staging candidates that strengthen the media set rather than recreating the entire tour as furnished images.
Prioritize:
- the main living area,
- the primary bedroom,
- an open-plan room where furniture clarifies zones,
- or a flex room whose function is not obvious.
Do not stage every empty space automatically. Utility areas, corridors, storage rooms, and weak source photos can add review work without strengthening the package. A concise hero set is easier to disclose.
Use source images with stable angles, adequate light, and unobstructed permanent features. The guide to virtual staging for real estate photos covers source selection in more detail.
If the tour is empty while stills show furniture, explain that the tour reflects the captured condition and the staged images illustrate a furnishing direction. Never imply that digital furniture is physically present.
Build the Production Sequence
A predictable sequence reduces duplicated work:
- Confirm the brief. Record the property condition, room list, staging direction, tour platform, delivery date, and approver.
- Capture the property. Follow the requirements of both the still-photo and tour systems while the site is ready and accessible.
- Edit the base photos. Complete exposure, perspective, and normal listing-photo corrections before selecting staging candidates.
- Create the tour. Process and review it through the selected tour provider or platform.
- Stage approved stills. Use the finished source photos and the agreed room direction.
- Run internal QA. Review stills against their originals and walk through the entire tour.
- Send one review package. Give the client direct links and a clear method for consolidated feedback.
- Deliver final assets. Include labeled files, originals, tour access details, and publishing notes.
This order keeps the base photography consistent and makes it clear that staging is applied to selected stills, not silently carried into the tour.
Price the Whole Workflow
Price from the work in the complete package, not an arbitrary surcharge on a normal shoot.
Your internal estimate should account for:
- booking and pre-shoot coordination,
- property capture time,
- photo editing and file preparation,
- tour processing or third-party platform costs,
- staging setup and output review,
- client communication and revisions,
- final organization and handoff,
- and any ongoing tour-hosting responsibility.
Present one package price while listing its components: the base media service, staged-image allowance, tour specification, and optional additions. This keeps the total simple while making scope changes visible.
Avoid an undefined “unlimited staging” promise. Tie the package to an image count and review policy. If a client requests more rooms, a second design direction, or a new tour capture, treat that as additional scope.
Use your own labor, software, hosting, revision, and delivery costs; no universal price fits every workflow. The virtual staging cost per photo guide separates generated-image cost from the cost of an approved deliverable.
Use a Two-Part Quality Check
The package is only ready when both components pass their own review.
For every staged still, confirm:
- walls, windows, doors, flooring, built-ins, and fixed features match the source;
- furniture scale and placement make sense;
- shadows, reflections, edges, and object intersections look credible;
- the staging does not conceal visible damage or materially alter the property;
- and the file is clearly identifiable as a staged version.
For the tour, confirm:
- navigation works from start to finish;
- rooms and transitions are correctly connected;
- no private documents, people, mirrors, or unintended areas are exposed;
- labels, property details, and branding are accurate;
- and the tour link works in a logged-out browser where appropriate.
Then compare the two. If the staged living room suggests a layout that contradicts the room geometry visible in the tour, revise or omit it. Coordination is the value of the package, even though the outputs come from separate workflows.
Make Client Review Easy
Send one review message with separate staged-still and tour sections. Show each original beside its staged option, then provide a tour preview link and ask the client to check every included area.
Set a feedback deadline and ask one decision-maker to consolidate notes. Distinguish corrections from new creative requests. A missing tour label is a correction; changing an approved living-room direction after delivery may be new scope.
Useful filenames include the room and state, such as living-room-original.jpg and living-room-virtually-staged.jpg. Avoid replacing an original with a staged file that has the same name. The client should be able to tell which asset they are handling without opening it.
Deliver a Complete Handoff
Make the final delivery clear enough to forward to a marketing coordinator. Include:
- a folder of standard edited listing photos,
- a separate folder of virtually staged stills,
- the corresponding unstaged originals,
- the final tour link and any access instructions,
- the hosting term or account responsibility,
- a short inventory of included deliverables,
- and a reminder to review disclosure requirements before publishing.
If the tour is hosted under your account, explain what happens when the agreed hosting period ends. If it is transferred to the client's account, confirm ownership and access as part of delivery. Do not let tour hosting become an invisible, indefinite obligation.
State that staged stills are illustrative while the tour reflects a separately captured property experience. This prevents the assets from being mistaken for one unified model.
Plan for Disclosure Before Publishing
Disclosure should be part of the package design, not a note added after approval. Local MLS, brokerage, portal, and advertising requirements can differ, so photographers should not promise that one wording or placement is universally compliant.
A responsible workflow can still make the client's job easier:
- retain the unstaged originals,
- identify staged files in names or metadata,
- note that furniture and decor were added digitally,
- avoid changing permanent property features,
- and direct the client to confirm the rules that apply to the intended channels.
When the empty room is visible in the tour and furnished in a still image, clarity is particularly important. The difference can help viewers understand the concept, but only when the staged asset is identified honestly.
Use these virtual staging disclosure examples as a starting point for client-facing language, then adapt the wording and placement to the relevant rules.
Where Planua Fits
Planua is the virtual-staging component inside this broader media package. A photographer can use it to create staged variants from selected listing photos, review those outputs against the originals, and include approved stills in the client delivery.
Planua does not capture, build, host, or modify virtual tours. Keep your existing tour platform or production partner for those functions. This separation gives each tool a clear role:
- your camera and tour system capture the property experience;
- Planua supports the staged still-image workflow;
- and your delivery process brings both components together for the client.
Photographers ready to add that staging component can explore Planua for real estate photographers.
Final Package Checklist
Before marking the project complete, confirm:
- the proposal names every still, staged image, and tour deliverable;
- staging limits and tour exclusions are written down;
- both components passed their separate QA checks;
- staged and original files are easy to distinguish;
- the tour link, hosting term, and account responsibility are documented;
- the client received a disclosure reminder;
- and any additional requests are quoted as new scope.
A strong virtual staging and tours package is a coordinated offer built from two complementary services. Keep the scope specific, review each output on its own terms, and supply enough context for responsible publishing.
Explore Planua for real estate photographers to add the virtual-staging component to your existing photo and tour packages.
Try It On A Real Listing
Ready to turn empty room photos into listing-ready interiors?
Use this topic on a real listing and see how Planua fits your virtual staging workflow.
Keep Reading
Related virtual staging guides
virtual staging vs traditional staging
Virtual Staging vs Traditional Staging: When Each Makes Sense
Compare virtual staging and traditional staging across speed, cost, buyer clarity, and operational fit for real estate teams.
virtual staging for real estate photographers
Virtual Staging for Real Estate Photographers: Add-On Workflow
A practical workflow for real estate photographers adding virtual staging to property media packages without creating review or delivery chaos.
California AB 723 virtual staging photos
California AB 723 and Virtual Staging Photos: A Checklist for Real Estate Agents
A practical California AB 723 checklist for real estate agents using virtual staging photos, including original-image access, disclosure, CRMLS steps, and review.